
Imagine starting your day with a breakfast that’s both tasty and nutritious. Granola cups are the ideal morning treat. They turn simple ingredients into a healthy snack that’s perfect for a busy schedule.
These granola cups are more than a meal; they’re a culinary journey. With just 10 minutes of prep and 22 minutes of cooking, you can make six servings. They’ll change your breakfast game.
Made with good stuff like rolled oats, maple syrup, and peanut butter, these snacks are a great way to begin your day. They’re perfect for anyone looking for tasty, healthy options. Granola cups offer a delicious and nutritious start or a satisfying midday snack.
Key Takeaways
- Quick and easy to prepare in under 30 minutes
- Yields 6 servings of nutritious granola cups
- Versatile recipe adaptable to dietary preferences
- Combines high-fiber oats with protein-rich ingredients
- Can be customized with various fruits and yogurt fillings
The Perfect Blend of Nutrition and Taste
Imagine a snack that’s both healthy and delicious. Homemade granola cups are just that. They’re packed with nutrients and can change how you eat every day.

Granola cups are more than a tasty snack. They’re a smart way to eat healthy. They fuel your body with important nutrients. Let’s see why they’re loved by health enthusiasts.
Benefits of Homemade Granola
When you make your own granola, you control what goes into it. You can:
- Pick the best whole grains
- Keep sugar levels low
- Make flavors you love
- Stay away from bad preservatives
Why Choose Granola Cups
Granola cups are great for people on the go:
- They’re easy to carry
- Good for kids too
- Perfect for quick meals
- Can be made ahead of time
Nutritional Value Overview
Homemade granola cups are full of good stuff:
- Protein: 7g per serving
- Healthy Fats: 19g, with good unsaturated fats
- Fiber: 2g for your gut health
- Low Sodium: Just 25mg per serving
“Nutrition doesn’t have to be boring – it can be delicious and fun!” – Nutrition Expert
Choosing homemade granola cups means you’re caring for your health. Every bite is a step towards wellness.
Essential Ingredients for Granola Cups

Making delicious homemade granola cups begins with picking the right ingredients. This simple recipe needs just six key parts. Together, they make a healthy and tasty snack.
Your main ingredients for these great granola cups are:
- Rolled oats – The base that gives structure and texture
- Honey or maple syrup – Natural sweeteners that hold everything together
- Ripe banana – Adds moisture and sweetness
- Coconut oil – Creates crispy edges
- Nuts and seeds – Increase protein and nutrition
- Vanilla extract – Makes the flavor even better
You can also add optional protein-rich ingredients like chia seeds or hemp seeds. These add extra nutrients like omega-3s, iron, and calcium.
Pro tip: Choose gluten-free granola if you have dietary restrictions, ensuring everyone can enjoy this delightful recipe!
By picking high-quality ingredients, you turn a simple recipe into a nutritious snack. It gives over 5 grams of protein per serving.
Kitchen Tools and Equipment Needed
Making delicious crunchy granola cups needs the right tools. Whether you’re new or experienced, the right equipment makes it easy and fun.
With the right tools, making your granola cups is a breeze. Let’s look at the key equipment you’ll need for these tasty treats.
Must-Have Baking Items
- Mixing bowls (various sizes)
- Measuring cups and spoons
- Silicone muffin tray (recommended for easy removal)
- Baking sheet
- Parchment paper
- Wooden spoon or spatula
Optional Accessories
These tools are not necessary but can make your experience better:
- Digital kitchen scale for precise measurements
- Pastry brush
- Cooling rack
- Food processor (for chopping nuts or mixing ingredients)
“The right tools can transform a good recipe into a great culinary experience.”
Invest in quality tools for better granola cup making. A good silicone muffin tray is key. It helps your granola cups come out perfectly and easily.
Step-by-Step Preparation Guide
Making delicious granola cups is simple and fun. This guide will help you make perfect granola cups every time.
First, get all your ingredients ready. Then, preheat your oven to 350°F. These granola cups are quick and healthy, ready in just 30 minutes.
Mixing the Base
- Combine dry ingredients in a large mixing bowl
- Whisk wet ingredients in a separate container
- Gently fold wet and dry ingredients together
Your granola mix should be a bit sticky. Pro tip: If it’s too dry, add 1-2 tablespoons of milk to get the right texture.
Shaping Your Granola Cups
- Grease a muffin tin thoroughly
- Press mixture firmly into each cup
- Create a small well in the center of each cup
- Ensure even distribution of mixture
“The key to perfect granola cups is patience and careful pressing”
You’ll get about 10 granola cups. Bake for 15-20 minutes until they’re golden and crispy. Let them cool in the tin for 30 minutes before taking them out.
Each cup has 160 calories. You can also add different fillings and toppings to make them even better.
Basic Recipe Components
To make tasty homemade granola cups, you need to know the key ingredients. Your crunchy granola cups will be amazing with the right mix of base ingredients, binding agents, and add-ins.
Base Mixture Essentials
The base of your granola cups is built with top-notch ingredients. Your base mixture usually has:
- 1 ½ cups rolled oats
- ½ cup oat flour
- Pinch of salt
Binding Agents
Binding agents are key for the right texture in your granola cups. The best ones are:
- ⅓ cup maple syrup
- ½ cup peanut butter
- Optional: mashed banana
“The secret to perfect granola cups is finding the right balance between dry ingredients and sticky binding agents.”
Optional Add-Ins
Make your homemade granola cups even better with these exciting mix-ins:
- ½ cup raw cashews
- ½ cup raw almonds
- ½ cup mixed seeds (pumpkin and sunflower)
- Optional: ½ tsp vanilla extract
- Optional: ½ tsp cinnamon
By choosing and mixing these ingredients well, you’ll get crunchy granola cups that are both healthy and yummy. Try out different mixes to find your favorite recipe!
Creative Filling Ideas and Toppings
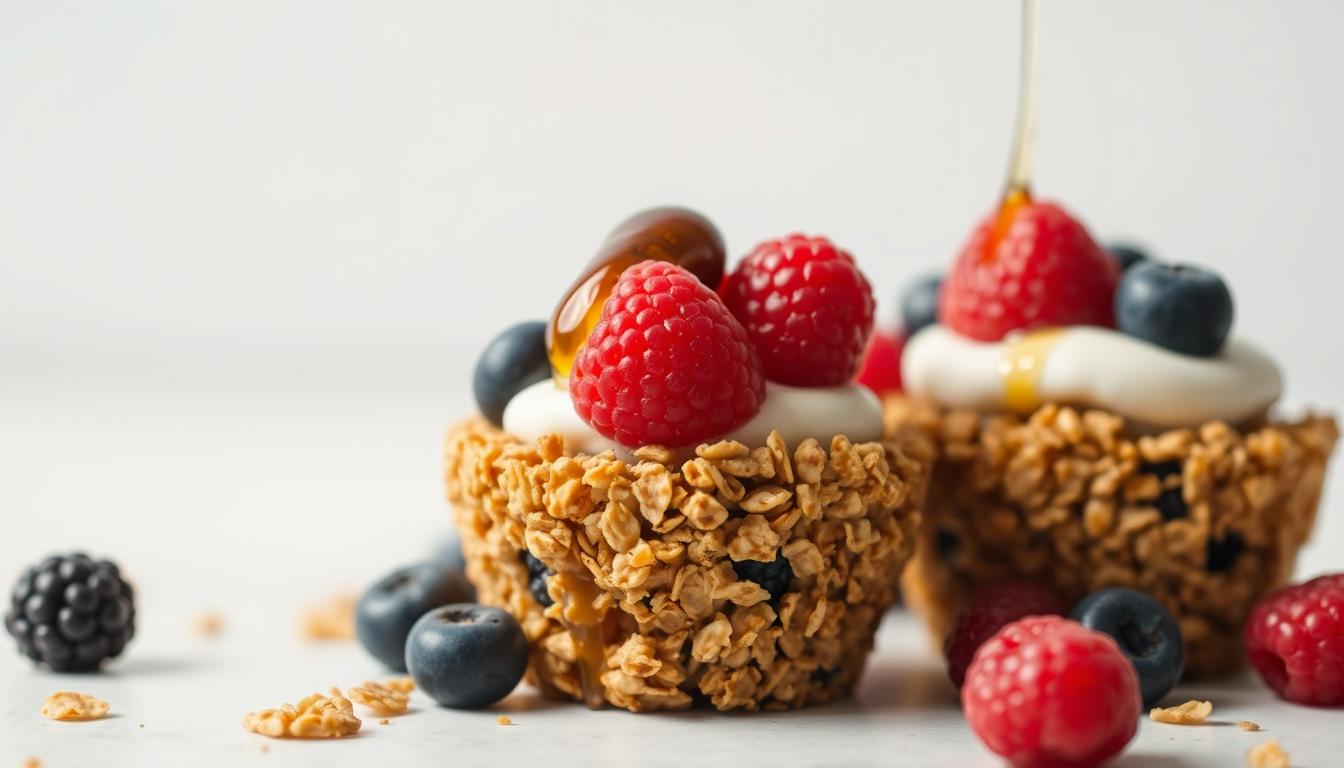
Turn your granola cups into tasty snacks and quick breakfasts with these fun fillings and toppings. They’re perfect for a morning pick-me-up or an afternoon treat. These ideas will make your granola cups even more special.
Healthy Breakfast Fillings
- Greek Yogurt Delight: Fill your granola cups with 3/4 cup of creamy Greek yogurt for a protein-packed start to your day
- Fresh Mixed Berries: Top with 1 cup of fresh or frozen berries for added natural sweetness
- Chia Seed Pudding: Create a nutrient-rich filling that’s perfect for breakfast on the go
Indulgent Dessert Variations
- Chocolate Lovers: Drizzle melted dark chocolate or sprinkle dairy-free chocolate chips
- Ice Cream Treat: Fill with a small scoop of your favorite ice cream for a decadent dessert
- Nut Butter Swirl: Add 1 tablespoon of melted peanut or almond butter for extra flavor
“Granola cups are the ultimate canvas for culinary creativity!” – Nutrition Expert
Pro tip: Mix and match your favorite toppings to create unique combinations. With just 30 minutes of prep time, you can prepare 9 delicious granola cups that store perfectly for 3-4 days in an airtight container.
Nutritional Topping Boosters
- Chia seeds
- Sliced almonds
- Coconut flakes
- Cinnamon sprinkle
Each granola cup provides approximately 119 calories and offers endless possibilities for customization. Whether you’re seeking snack ideas or a quick breakfast on the go, these granola cups will become your new favorite versatile treat!
Storage Tips and Shelf Life
Keeping your homemade granola cups fresh is key. Smart storage helps keep them crunchy and flavorful. Your hard work deserves it.
Room Temperature Storage
- Store in an airtight container
- Keep away from direct sunlight
- Use within 4-7 days for optimal freshness
Refrigeration Methods
Refrigerating your granola cups can make them last longer. Pro tip: Use a sealed container with a paper towel to soak up moisture.
Freezing Instructions
Freezing is a great way to keep your granola cups fresh for months. Here’s how:
- Wrap individual cups in plastic wrap
- Place in a freezer-safe container
- Store for up to 3 months
“Proper storage is the secret to enjoying your granola cups anytime!” – Baking Enthusiasts
Vacuum-sealing can make your granola cups last even longer. Use oxygen absorbers in containers to keep them fresh.
Follow these tips to keep your granola cups crunchy and tasty. They’ll be ready for a quick, healthy snack anytime.
Making Granola Cups for Special Diets
Making gluten-free granola cups is simpler than you might think. Just a few ingredient swaps can turn traditional recipes into snacks for different diets.
For those on a gluten-free diet, picking the right ingredients is key. Here are some important substitutions:
- Use certified gluten-free oats as your main grain
- Replace wheat-based binders with almond flour or ground flaxseed
- Make sure all ingredients are labeled gluten-free to avoid cross-contamination
Creating dairy-free and vegan versions is also easy. Just make these changes:
- Swap butter with coconut oil or olive oil
- Use plant-based yogurts like coconut or almond instead of dairy
- Choose maple syrup or agave nectar over honey for vegan recipes
“Dietary restrictions don’t mean sacrificing flavor or nutrition in your healthy snacks!” – Culinary Nutrition Expert
Remember, swapping ingredients can change texture and taste. Try different mixes to create your ideal gluten-free granola cup. It should meet your dietary needs and still taste great.
Time-Saving Tips and Batch Preparation
Preparing granola cups doesn’t have to take a lot of time. With smart meal prep strategies, you can make tasty breakfasts that save you morning minutes.
Meal Prep Strategies for Busy Lifestyles
Turning snack ideas into efficient meal prep can change your morning routine. Here are some practical tips:
- Batch prepare granola cups on weekends
- Store in portion-controlled containers
- Freeze extra batches for quick grab-and-go options
Make-Ahead Options for Maximum Convenience
Maximize your meal prep with these storage tips:
- Prepare base mixtures up to 4 days in advance
- Store prepared granola cups in refrigerator for optimal freshness
- Utilize freezer storage for up to 4 months
Pro Tip: Energy bites made from oats, dried fruit, and nut butter can be stored in the fridge for a week, making them perfect for breakfast on the go.
By using these strategies, you’ll make delicious snacks that save time and support a healthy lifestyle. Meal prepping granola cups means you always have a nutritious breakfast ready, even on your busiest mornings.
Common Mistakes to Avoid
Making perfect homemade granola cups can be challenging. Even skilled cooks sometimes face issues with texture and consistency. Knowing common mistakes helps you make great granola cups every time.
Temperature and timing are key when baking your granola. Baking between 300°F and 350°F helps avoid burning. Many bakers accidentally overcook, which can increase burning risk by up to 40%.
- Avoid overmixing: Gentle mixing keeps your granola’s texture right
- Measure ingredients precisely for the right moisture balance
- Use fresh ingredients for the best flavor and texture
- Watch baking time closely to avoid burning
Ingredient ratios are crucial for your granola cup’s success. Here are some tips:
- Limit dried spices to one teaspoon per batch
- Add a pinch of salt to boost flavor
- Add dried fruits after baking to avoid burning
“The difference between good and great granola often lies in careful attention to detail.”
For a recipe that works every time, focus on your wet-to-dry ingredient ratio. Staying within 10% of the ratio is key for texture and flavor. Homemade granola can last up to four weeks at room temperature, so you can enjoy it for a while.
Serving Suggestions and Presentation Ideas
Turn your homemade granola cups into more than just a snack. They can be a fun twist on the usual granola bar. These treats are perfect for getting creative with serving and presentation.
Here are some cool ways to enjoy your granola cups:
- Breakfast Parfait: Layer yogurt and fresh berries inside the granola cups
- Dessert Delight: Top with a scoop of vanilla ice cream and chocolate drizzle
- Afternoon Snack: Pack individually for quick on-the-go nutrition
- Brunch Centerpiece: Create a granola cup bar with multiple filling options
At brunch or a morning event, set up a granola cup station. Offer different toppings like:
- Fresh fruits (strawberries, blueberries)
- Nut butter spreads
- Honey or maple syrup
- Chopped nuts
- Chocolate chips
“Granola cups are not just a snack, they’re a canvas for culinary creativity!”
For easy serving and a nice look, use clear 4-ounce Ball jars or 12-ounce paper cups. These containers make your granola cups both appealing and easy to serve to guests.
Conclusion
Exploring granola cups is a fun way to make healthy snacks that taste great. These treats let you get creative in the kitchen. They also help you stay healthy and enjoy good food.
Learning to make granola cups is a skill. It shows you how to turn simple ingredients into something special. You can make them for breakfast, a snack, or after working out. They can be made just the way you like them.
Creating the best granola cups takes time and practice. Every batch you make helps you get better at mixing textures, flavors, and nutrition. With this guide, you’re ready to try new things and enjoy your homemade snacks.
We encourage you to share your granola cup recipes and ideas. Keep exploring and making new dishes. Your adventure with granola cups is just starting!
1 thought on “Healthy Granola Cups: A Tasty Treat”
Comments are closed.